Feature Levels
Feature levels are a way to define a set of features that will be available to each listing.
Default feature level
Listings without any feature level assigned will automatically have the features of the Default feature level applied.
To configure the Default feature level, follow these steps:
Log in to your website if you are not already logged in, and go to the WordPress administration dashboard.
Go to Directories -> Your directory -> Content Types -> Listing -> Edit, and scroll down to Feature Level Settings.

Click the gear icon in the row of the Default level.
In the popup window, change the label for the feature level if you wish, then click Next and configure the features for the Default level.
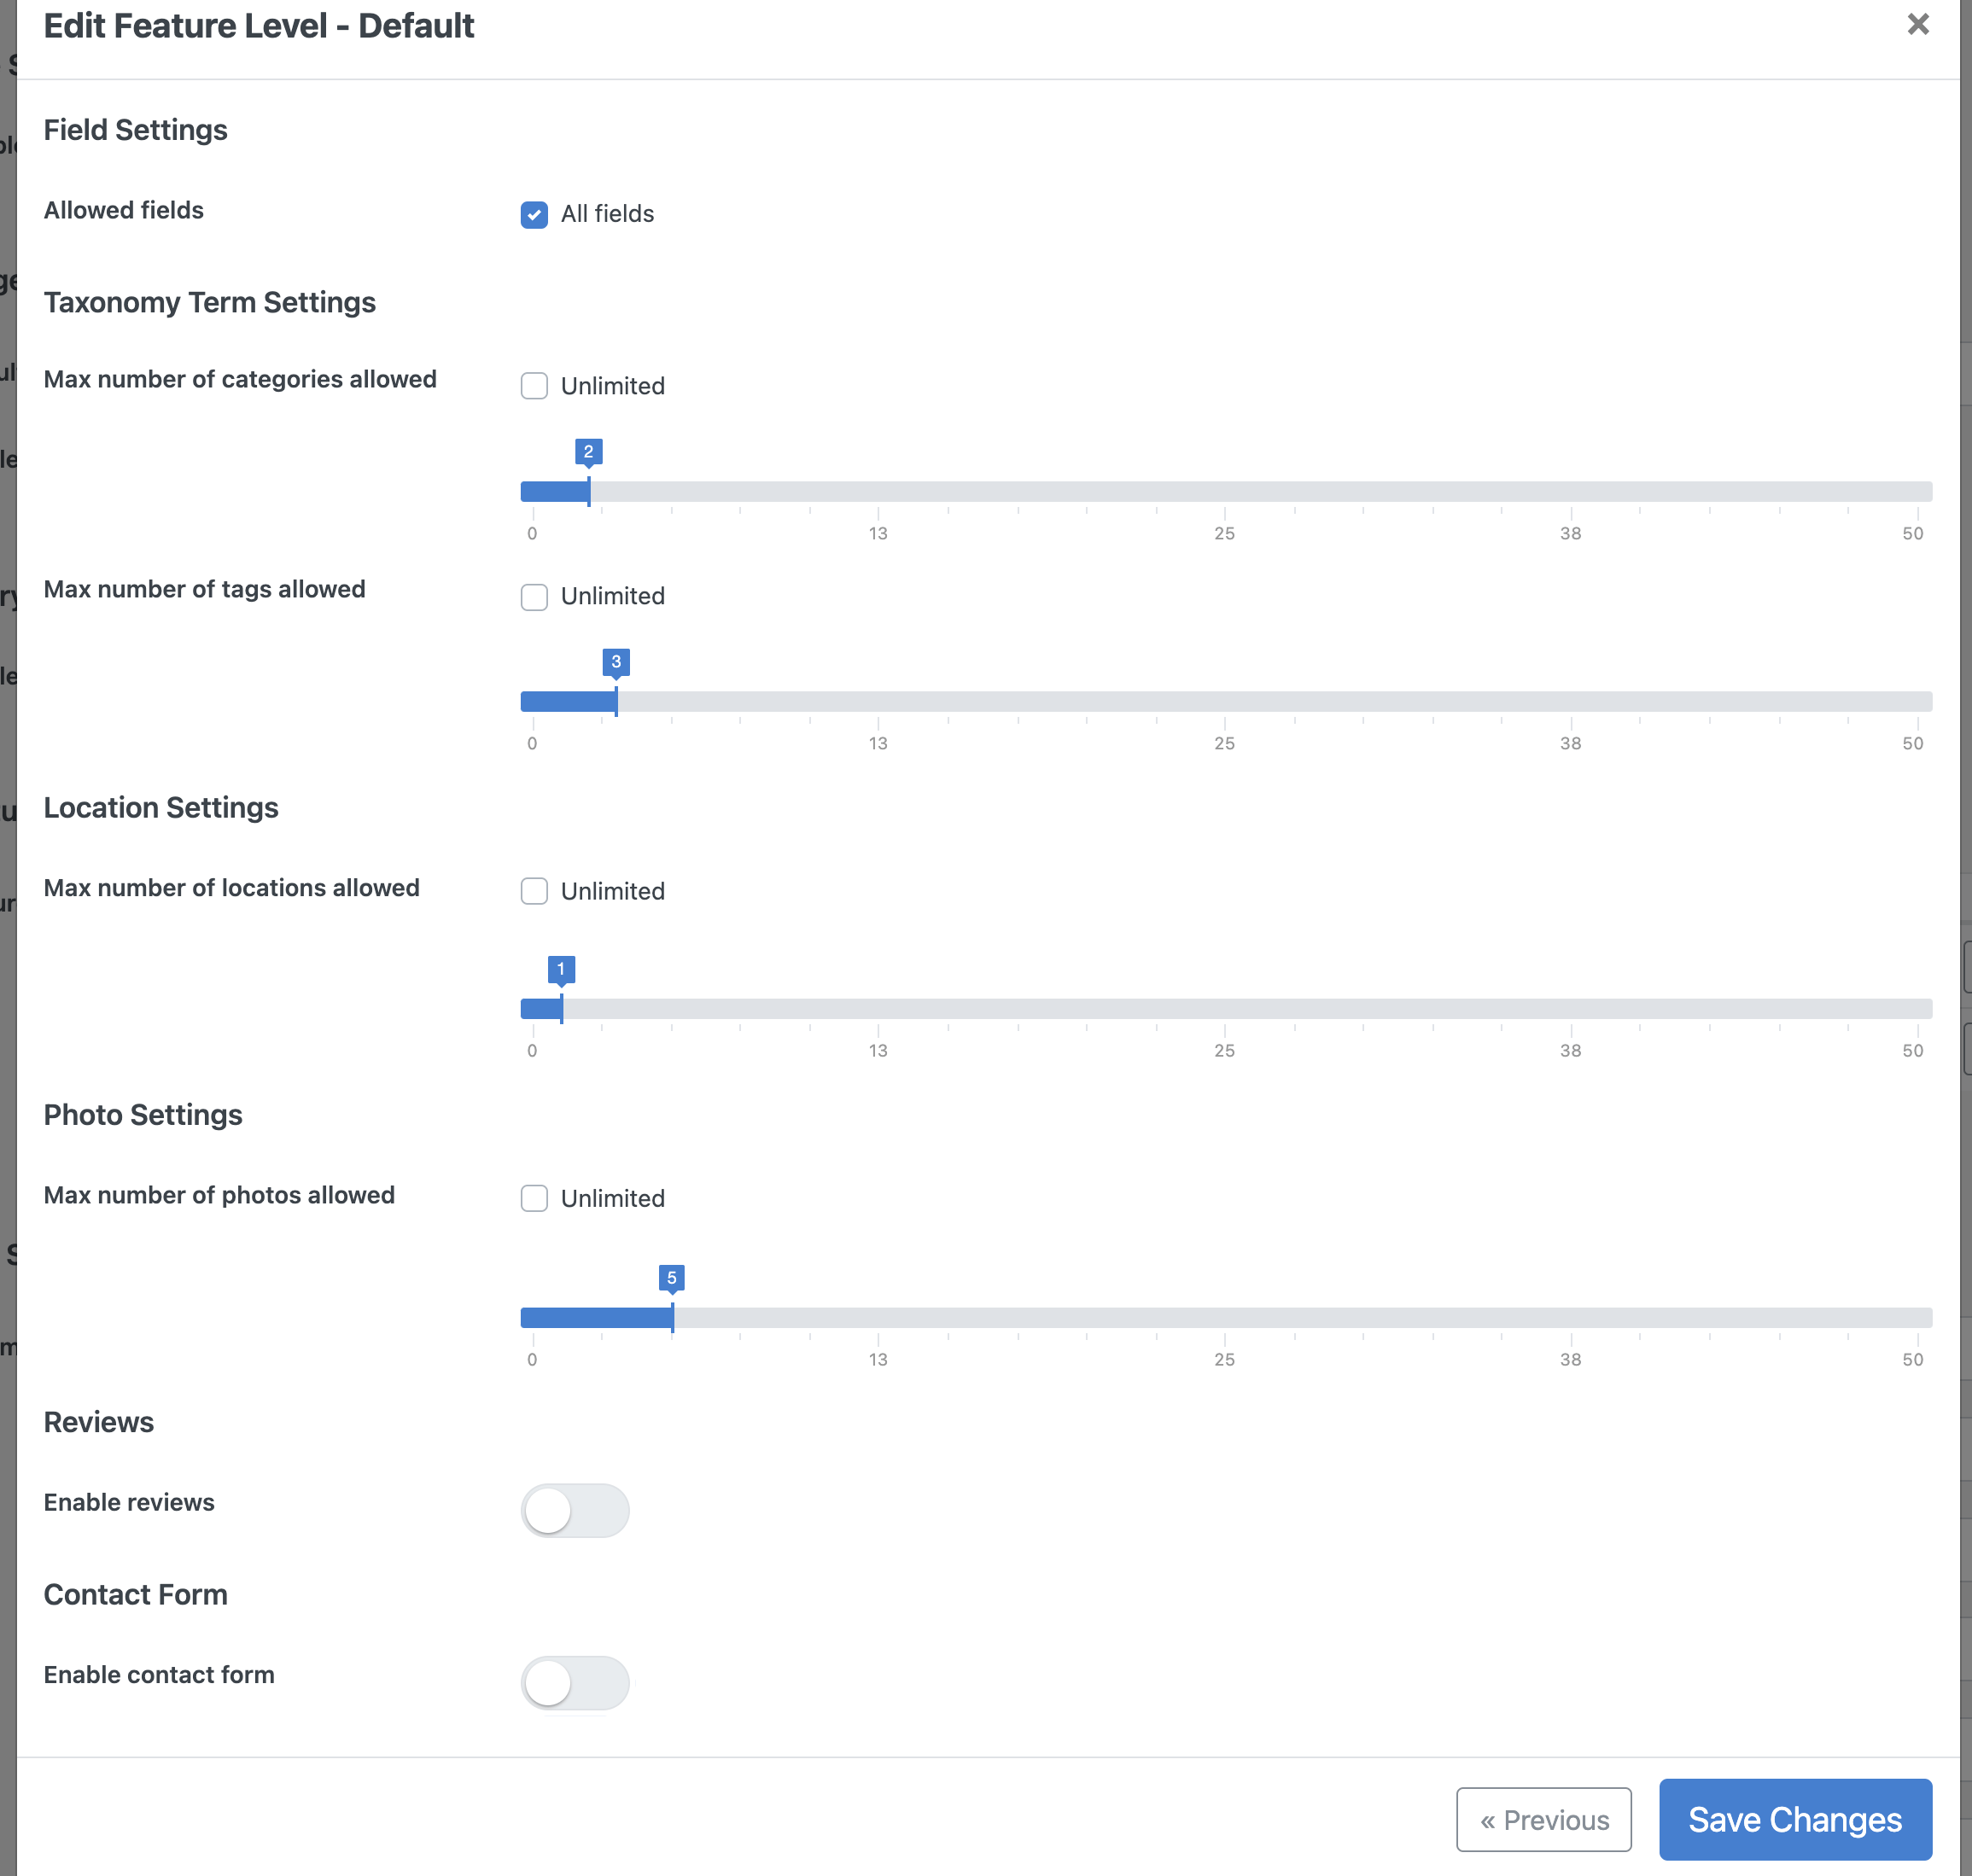
Field Settings
- Allowed fields - Select the fields enabled for each listing.
Taxonomy Term Settings
- Max number of categories allowed - Select the maximum number of categories each listing can be associated with.
- Max number of tags allowed - Select the maximum number of tags each listing can be associated with.
Location Settings
- Max number of locations allowed - Select the maximum number of locations each listing can be associated with.
Photo Settings
- Max number of photos allowed - Select the maximum number of photos that can be uploaded for each listing.
Reviews
- Enable reviews - Enable this option to allow users to submit reviews for each listing.
Contact Form Settings
- Enable contact form - Enable this option to allow users to send messages to listing authors through a Contact Us form.
- Contact form recipients - Select email addresses to which messages are sent. If you have added Email-type custom fields to listings (see Adding and Managing Fields), those fields can also be selected here.
Click Save Changes.
Adding a feature level
Log in to your website if you are not already logged in, and go to the WordPress administration dashboard.
Go to Directories -> Your directory -> Content Types -> Listing -> Edit, and scroll down to Feature Level Settings.
Click the Add Feature Level button.
In the popup window, enter the Label and Name for the feature level, then click Next and configure the features for this level.

For details on each feature, see Default feature level.
Click the Add Feature Level button to complete.
Assigning a feature level
Assign manually
You can assign a feature level to listings by editing each listing in the backend and selecting a feature level from the dropdown in the Feature level metabox.

Note that the Feature level metabox will not be displayed if only the Default feature level is available.
Assign by user role
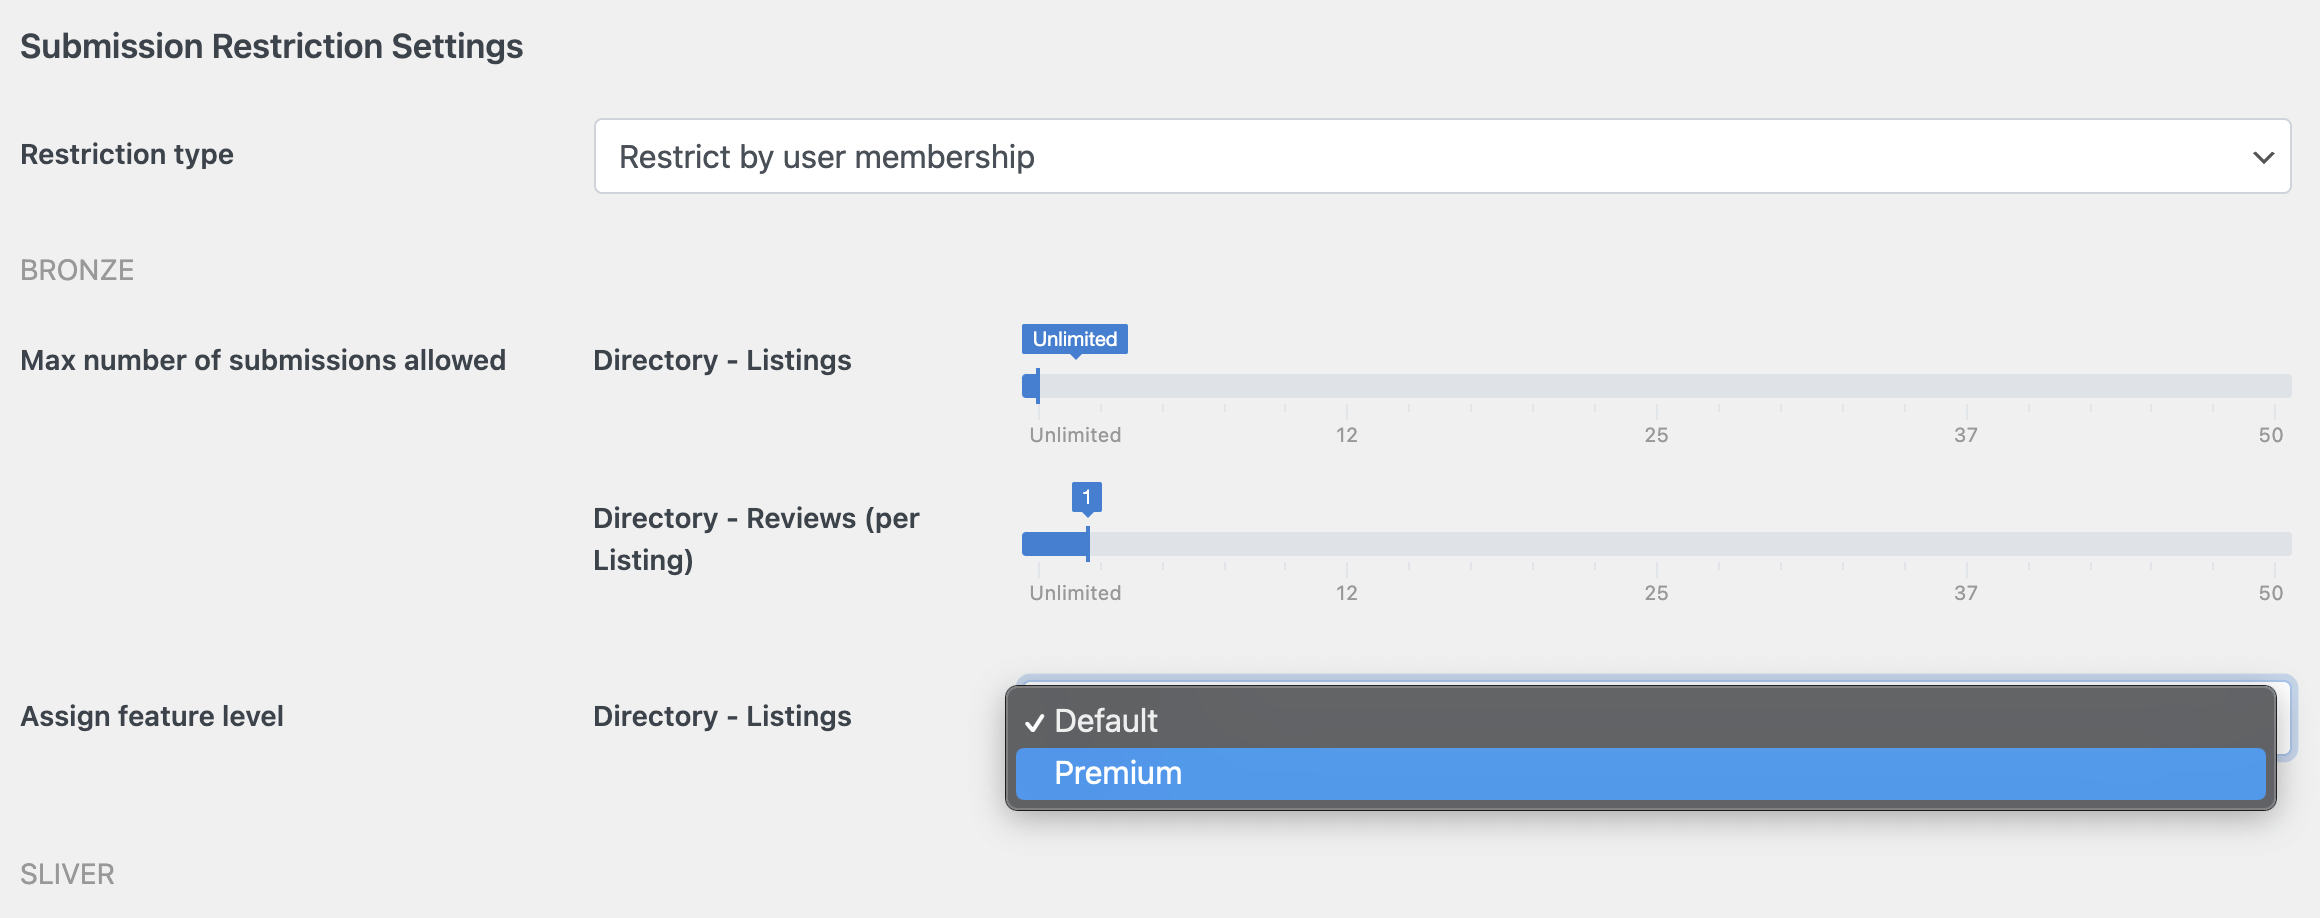
A feature level can be automatically assigned to each listing by user role during frontend submission. You can select a feature level for each user role in the Submission restriction settings. Make sure to select Restrict by WordPress user role for Restriction type.

Assign by payment plan
You can map a feature level to each payment plan when adding or editing a payment plan, so that you do not need to configure features for each payment plan individually.

Assign by user membership
If there are user membership plans (see Memberships) on your site, a feature level can be automatically assigned to each listing by user membership during frontend submission. You can select a feature level for each membership payment plan in the Submission restriction settings. Make sure to select Restrict by user membership for Restriction type.