Report Moderation
Overview
The report moderation feature allows users to report inappropriate or problematic items such as listings or reviews. When a certain number of reports or a score threshold is reached, automated actions — such as setting the item’s status to pending or draft, moving it to trash, or notifying administrators — can be triggered to help keep your directory safe and clean.
Enable report moderation
Follow these steps to enable report moderation for your directory:
Log in to your website (if not already logged in) and go to the WordPress admin dashboard.
In the admin sidebar, click Directories.
Click the Settings tab, then go to the Security sub-tab.
In the Report Moderation Settings section, turn on the Enable report moderation option.
Scroll down and click Save Changes to apply the setting.
Report moderation settings
Once report moderation is enabled, you can configure the following settings in the Report Moderation Settings section to control how reports are handled:
- Severity levels – Define the levels of severity for reports, ranging from minor issues to critical violations. Users can select these levels when submitting a report.
- Require reason for report – If enabled, users must provide a reason when submitting a report.
- Report count threshold – Specify the number of reports required before the moderation action is triggered.
- Report severity score threshold – Specify the total severity score required before the moderation action is triggered.
- Average severity score threshold – Specify the minimum average severity score required before the moderation action is triggered. This helps filter out low-severity reports.
- Action on reaching threshold – Select the action to perform when the thresholds are met:
- Set status to pending – Change the item’s post status to Pending.
- Set status to draft – Change the item’s post status to Draft.
- Move to trash – Move the item to the trash.
- None – Take no action.
- Reset reports on action - If enabled, all report data for the item (e.g., report count and severity score) will be cleared after the action is performed.
Reporting an item
To allow users to report items, you need to enable the report item button in the display settings:
- On your directory admin main page, click the Content Types tab.
- Click the dropdown button in the Listing row and then click Manage Displays.
- Click the Detailed sub-tab.
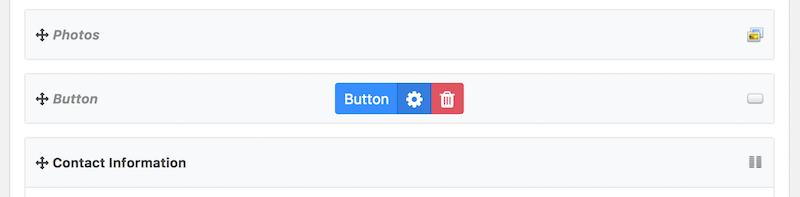
If there is no Button display element, create one. Then click the gear icon on the Button display element.
See the screenshot below:
In the popup window, check the Report item button option under General -> Select buttons.
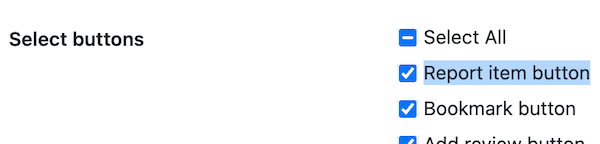
- Optionally, configure additional settings for the button from the Buttons tab, such as hiding the button label or changing the button color.
- Click Save Changes.
Users will now see a report item button on listing pages and can submit reports as needed.
Below is an example of how the report item button appears to users on a listing page:

When a user clicks the report item button, a report form will appear. The user can select a reason for the report and provide additional details if required:
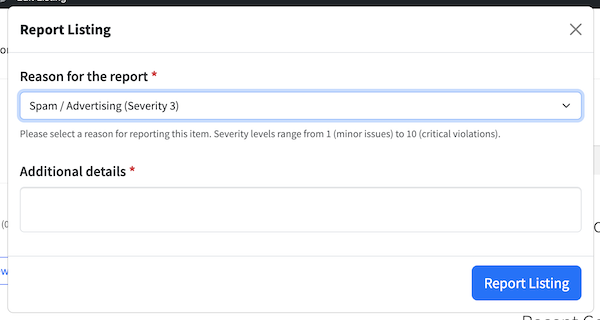
- Reason for the report: Users must select a reason from the dropdown menu. The available reasons are configured by the site administrator.
- Additional details: Depending on your settings, users may be able to provide more information about their report.
After submitting the form, the report will be recorded and processed according to your moderation settings.
To learn how to view and manage submitted reports, see the Viewing reports section below.
Viewing reports
Once reports are submitted, administrators can view and manage them in the WordPress admin dashboard. Reports are grouped by content items, showing the number of reports, the average severity score, and the status of each content item. Here’s how to access and manage the reports:
Log in to your website and go to the WordPress admin dashboard.
In the admin sidebar, click Directories.
Click the System tab, then go to the Reports sub-tab.
Here, you will see a list of content items with the following details:
- Reported item: The title or identifier of the item that has been reported.
- Number of reports: The total number of reports submitted for the content item.
- Severity score: The average severity score of all reports for the content item.
- Status: The current status of the content item (e.g., Published, Pending, Draft, or Trash).

To view more details about reports for each content item, click on the number under the Number of reports column. This will open a popup window, where you can see all the current active reports submitted for the content item.

Depending on your report moderation settings, you can take actions such as marking reports as reviewed or deleting reports. Note that the status of the content item cannot be changed directly from this interface.
By regularly monitoring and managing reports, you can ensure that your directory remains a safe and trustworthy environment for all users.