Custom Taxonomies
Directories Pro lets you organize listings by categories, tags, and locations, which are default custom taxonomies created automatically for your directory. You can also define additional custom taxonomies and enable them per directory. Custom taxonomies that you define will have all the features that categories and tags have, such as single term pages, fields, filters, and search.
Defining a custom taxonomy
To define your custom taxonomy, follow these steps:
Login to your website if not yet logged in and go to the WordPress administration dashboard.
Click Directories in the admin sidebar.
Click the Settings tab and then the Directory sub-tab.
Scroll down to the Taxonomy Settings section.

Click the Add Custom Taxonomy button and fill out the form displayed in in a popup window.
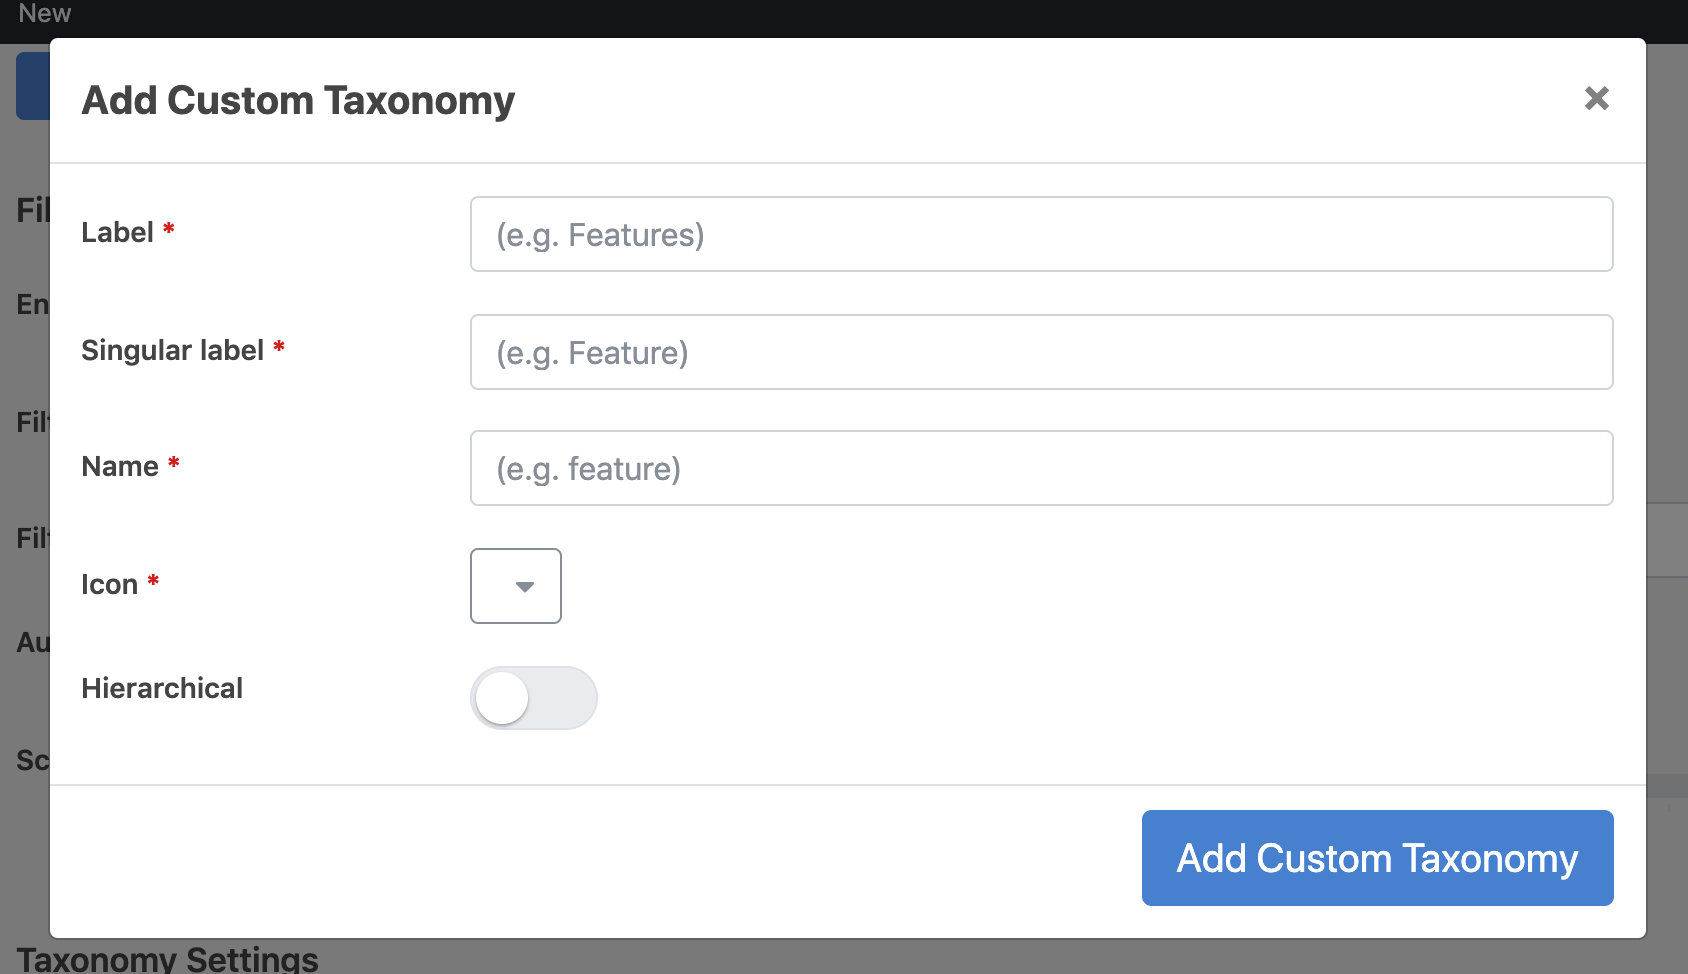
Label - Enter the default display label in the plural form (e.g. Features).
Singular label - Enter the default display label in the singular form (e.g. Feature).
Name - Enter a machine readable name which may not be changed later. Only lowercase alphanumeric characters and underscores are allowed with maximum of 15 characters, and must start with a alphanumeric character (e.g. feature).
Icon - Select the default display icon for your custom taxonomy.
Hierarchical - Switch this setting on if your custom taxonomy can have a structure with children and parent taxonomy terms, just like categories. Leave this setting switched off if your custom taxonomy is non-hierarchical like tags. This setting may not be changed later.
Press the blue Add Custom Taxonomy button in the popup window which will add your custom taxonomy to the Custom Taxonomies list.

You can add any number of custom taxonomies by repeating steps 5 and 6. You can also delete any existing ones by clicking the red trash icon on the right. After you are done, scroll down and press Save Changes.
Enabling custom taxonomies in your directory
Login to your website if not yet logged in and go to the WordPress administration dashboard.
Click Directories in the admin sidebar.
Under the All Directories tab, click the gear icon in the row of the directory that you wish to configure.
Under the Settings tab, scroll down to the Enable custom taxonomies setting. There you should see custom taxonomies that you have defined.

Select the custom taxonomies that you wish to enable for your directory and press Save Changes.
Note: If single term pages for your custom taxonomy in the frontend do not work for some reason, try running the Reload components tool from Directories -> System -> Tools and then visit Settings -> Permalinks (no saving required) in WordPress settings to flush URL rewrite rules cached internally by WordPress.