Creating Your First Directory
Now that you have installed Directories Pro, you are ready to start adding directories to your site.
Follow the steps below to create a new directory.
Login to your website if not yet logged in and go to the WordPress administration dashboard.
Click Directories in the admin sidebar.

Click the Add Directory green button under the All Directories tab which will open a popup window.
In the popup window, choose Configure a new directory for Choose a method.

Configure the following settings for your directory.
Directory type - Select Directory.
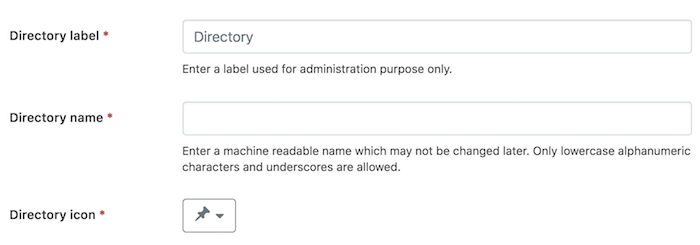
Directory label - Enter a label for your directory which is used for administration purpose only. This will also be used as the menu item label of the directory in the admin sidebar.
Directory name - Enter a machine-readable name which may not be changed later. Only lowercase alphanumeric characters and underscores are allowed with maximum of 12 characters.
Directory icon - Select an icon to be displayed for the menu item of the directory in the admin sidebar.
Enable taxonomy - Categories - Whether to enable categories for your directory. Categories can be used to organize listings in hierarchical groups.
Enable taxonomy - Tags - Whether to enable tags for your directory. Tags can be used to organize listings in groups according to common keywords or phrases.
Enable taxonomy - Locations - Whether to enable locations for your directory. Locations can be used to organize and display listings in groups by geographical location. See Managing Locations for more details.
Enable comparison - Whether to enable comparison of listings in your directory. See Comparing Listings for more details.
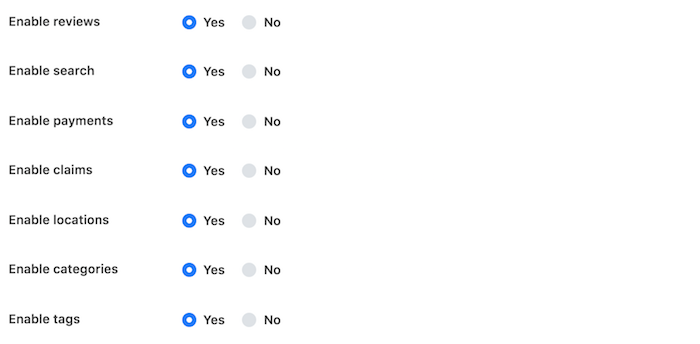
Enable search - Whether to enable the search feature which lets you create a search form for your directory.
Enable frontend submit - Whether to enable accepting frontend submissions from users. See Setting Up Frontend Submission and Dashboard Pages for more details.
Enable reviews - Whether to allows users to submit reviews for listings with customizable rating criteria. See Reviews for more details.
Enable claims - Whether to allow users to claim their listings. See Claiming Listings for more details.
Enable payments - Whether to enable paid listings in your directory. See Monetization for more details.
Enable booking - Whether to enable booking for listings in your directory. See Bookings for more details.
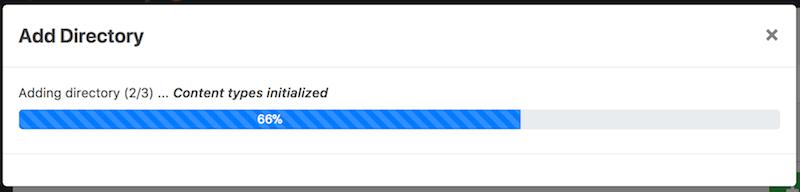
Once you are ready, click the Add Directory button at the bottom of the popup window. A progress bar will show up indicating the status of the directory creation process. Make sure that you do not close the window until the process is complete.
When the process is complete, the pop window closes and you will be redirected to the main administration page of the directory created.
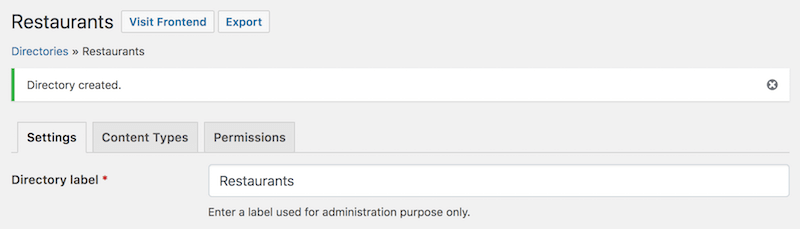
From this page you can configure settings, content types, and permissions of the directory.
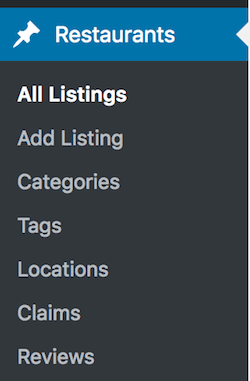
Also notice that a new menu section for the directory has been added to the admin sidebar containing links to manage content of your directory. If the label of your directory is "Restaurants", then you will see a new menu section labelled "Restaurants" created as shown below:
Congratulations, you have successfully created your first directory!