Customizing Pages
Directory pages and single post/term pages can be customized using shortcodes.
Customizing directory pages
Directory pages can be customized by editing the page assigned to each directory page in Directories -> Settings -> Pages.
For example, here is how you can add a notice above the directory main page of your directory.
Login to your website if not yet logged in and go to the WordPress administration dashboard.
Click Directories in the admin sidebar.
Click the Settings tab and then the Pages sub-tab.
Scroll down to Page Settings and copy the shortcode shown under the dropdown field for your directory.

Click the Edit link next to the dropdown field to edit the page. Paste the shortcode copied in step 4 to the content section of the page and add a custom notice message above the shortcode.
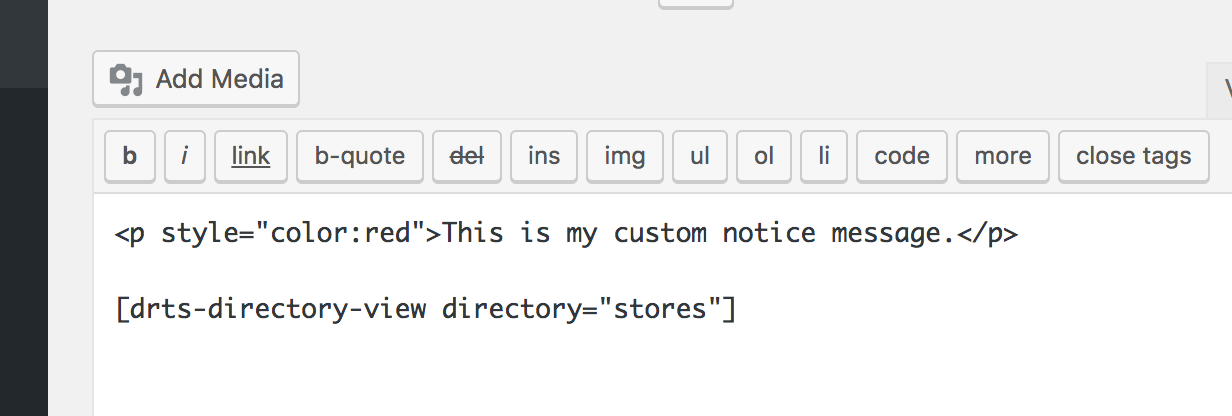
Update the page, and the page will now look like below in the frontend.

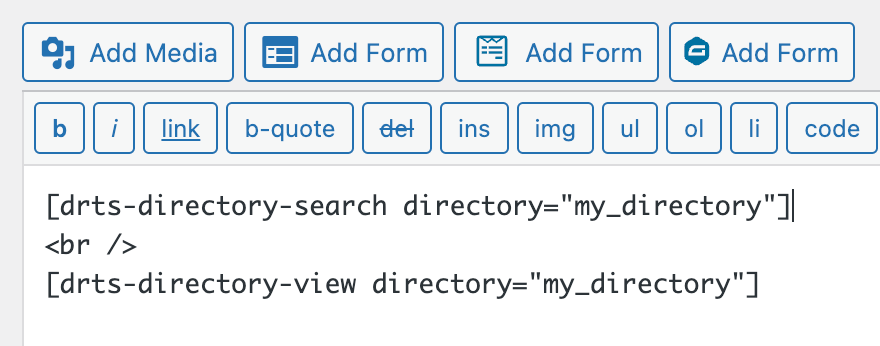
You can also use shortcodes such as the search form shortcode ([drts-directory-search]).
Customizing single post and term pages
You can either create a separate WordPress page and use it as a page template or use a 3rd party page builder to customize the single post (listing/review) or term (category/location/tag) page.
Using a page template
Login to your website if not yet logged in and go to the WordPress administration dashboard.
Create a new page from Pages -> Add New. Enter any title and enter
[drts-entity]into the content section of the page.Go to Directories and under the All Directories tab, click the gear icon in the row of the directory that you wish to configure.
Under the Content Types tab, click the Edit button in the Listing (or Review, Category, Location, Tag) row.
Click the SEO sub-tab.
Scroll down to Permalink Settings and select the page created in step 2 from the Assign page template dropdown field.

Scroll further down and click Save Changes.
You can now further edit the assigned page to customize the look of the single post (listing/review) or term (category/location/tag) page. If you wish to show only certain parts of the content or field values, you can use the display_element or the field parameter of the [drts-entity] shortcode (see [drts-entity] shortcode).
Using a 3rd party page builder
Note: This method works with the single post page only.
Elementor - Create a template from Templates -> Add New. Make sure to select Single as the template type and then select the post type for listings (or reviews) in your directory. You can then use the
[drts-entity]shortcode (see [drts-entity] shortcode) in the template.Divi - Add a new template from Divi -> Theme Builder. Click the gear icon of the template to open template settings and select the post type for listings (or reviews) in your directory under Use On. You can then use the
[drts-entity]shortcode (see [drts-entity] shortcode) in the body section of the template.Oxygen Builder - Create a template from Oxygen -> Templates -> Add New Template. Under OXYGEN -> WHERE DOES THIS TEMPLATE APPLY? -> Singular, check the post type for listings (or reviews) in your directory. You can then use the
[drts-entity]shortcode (see [drts-entity] shortcode) in the template.
[drts-entity] shortcode
This shortcode will display the full content of the post/term currently viewed when used without any parameter.
[drts-entity]
You can also use the shortcode to output a single field value or a partial content rendered by a display element for the currently viewed post/term.
Displaying a field value
Use the field parameter to display a value of a specific field of the currently viewed post/term.
[drts-entity field="xxx"]
where xxx represents the name of field to display. This will output a human readable text value of the specified field for the currently viewed post/term.
Note that not all field types are supported by this method.
Displaying a display element
Use the display_element parameter to show a display element of the Detailed display.
[drts-entity display_element="xxx"]
where xxx represents the ID of a display element.
For example, follow the steps below to get the shortcode for a display element of the Detailed display of listings.
Login to your website if not yet logged in and go to the WordPress administration dashboard.
Click Directories in the admin sidebar.
Under the All Directories tab, click the gear icon in the row of the directory to edit.
Under the Content Types tab, click the dropdown button in the Listing row and then click Manage Displays. Make sure the Detailed display is selected.
Hover over to the display element that you wish to get a shortcode for and click the information button (turquoise colored button with "i").
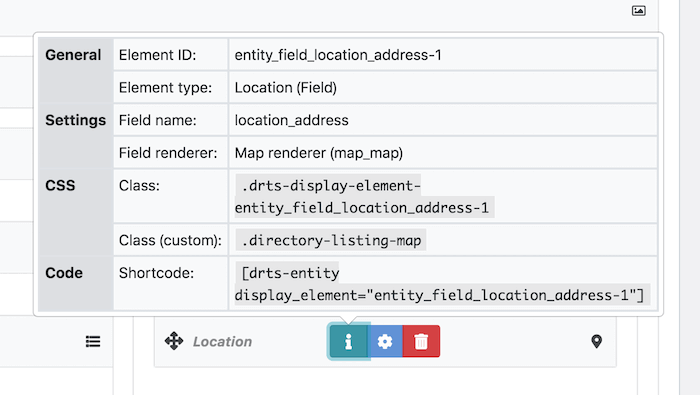
Copy the shortcode displayed in the popup box.
