Purchasing Payment Plans
Purchasing a base or subscription plan
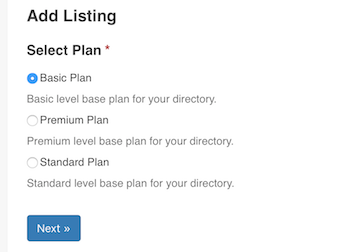
Once you have enabled payment for your directory and have created base or subscription payment plans, you will see a payment plan section form before entering listing details.
After entering listing details, you will be redirected to the checkout page to make a payment. When the payment is complete, the status of the order is updated to Completed either automatically by the system or manually by the administrator depending on the payment gateway selected during checkout.
Once the status of the order is updated to Completed, the post status of the listing becomes Published if the author of the listing has the Publish Listings permission. If the author of the listing does not have the Publish Listings permission, then the post status of the listing remains Pending and requires manual update of the post status by the administrator in order for the listing to be published in the frontend. For more details on permissions, see Permissions
Renewing plan
Once the duration of the currently associated base plan for a listing expires, the author of the listing is given a certain amount of time for renewal (renewal grace period) which is 30 days by default. The listing author can either purchase the same base plan purchased previously for the listing or a different base plan by following these steps:
Go to the Frontend Dashboard page in the frontend.
Click the Listings link in the side panel.
Click the Status: All dropdown button and select Expired.

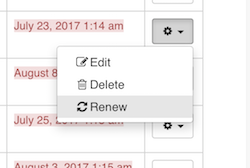
Go to the row of the listing you wish to renew, click the dropdown button with a gear icon and then select Renew.
Choose a plan in the select plan form and proceed to checkout.
Switching plan
Listings with a valid base plan that are currently published can be switched to another base plan at any time from the frontend dashboard page.
Go to the Frontend Dashboard page in the frontend.
Click the Listings link in the side panel.
Click the Status: All dropdown button and select Published.
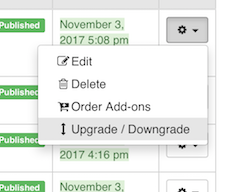
Go to the row of the listing you wish to switch plan for and click the gear icon dropdown button and then select Upgrade / Downgrade.
Choose a plan in the select plan form and proceed to checkout.
Prorated discount
When switching to another base plan, if the current base plan had a certain duration configured at the time of purchase, then the plan purchase fee already paid for the remaining period of time will be deducted from the total amount of purchasing the new base plan (prorated discount). However, if no duration was configured for the current base plan then there will be no deduction.
Guest purchases (WooCommerce only)
Guest users can purchase base plans if the Guest user role has the Create Listings permission (see Permissions for details on permissions) and also if the Allow customers to place orders without an account option is enabled in WooCommerce guest checkout settings (WooCommerce -> Settings -> Accounts and Privacy -> Guest checkout). If not, guest users will go through the normal submission process and their listings will have no base plans assigned.
You can also let guest users login to an existing account during checkout by switching on the Allow customers to log into an existing account during checkout option or create an account by switching on the Allow customers to create an account during checkout option under WooCommerce account creation settings (WooCommerce -> Settings -> Accounts and Privacy -> Account creation).
Purchasing add-on plans
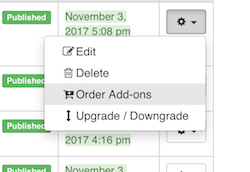
Add-on plans can be purchased by selecting the Order Add-on link in the dropdown button displayed for each listing on the frontend dashboard page. The checkout and payment process is exactly the same as ordering base plans.
Note that listings must currently be published and also has a valid base plan associated in order to purchase add-on plans.
Additional notes
If there is one or more active pending orders for a listing, then no further orders can be made for the listing.
When a plan is purchased for a listing in a multilingual-enabled directory (see Multilingual Directory), the features provided by the purchased plan are applied automatically to all other translations of the listing.