Localization
Translating with .po/.mo files
The language file for Directories Pro is in the Gettext format, which is the standard format used for language files in WordPress. A .pot (Portable Object Template) file can be found under the languages sub-folder:
- wp-content/plugins/directories-pro/languages/directories-pro.pot
Translate the file using translation software such as Poedit (recommended) and save the generated MO (.mo) file under wp-content/languages/plugins. Make sure to append the language code of your language to the file name. For example, if you are translating into French, save the generated MO file as directories-pro-fr_FR.mo.
If you are unsure what language code is currently used on your site, go to Directories -> System -> System Info, scroll down to the table labeled WordPress environment and check the value displayed for Locale as shown below:

Note: Some phrases such as labels used for fields, displays, and filters are not translated unless you had your language files ready before activating the plugin. This is because those phrases can be edited from the backend, and it would become a problem if they are overwritten by uploading language files.
Translating with Loco Translate plugin
If you wish to translate phrases in Directories Pro from the WordPress admin dashboard, we recommend using the Loco Translate plugin.
Install and activate the Loco Translate plugin.
Go to Loco Translate -> Plugins.
Click Directories Pro.
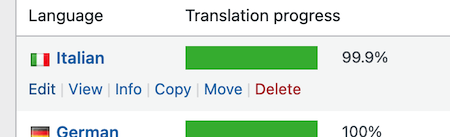
Click the Edit link under the language that you wish to translate to. If there is no language that you wish to translate to, click New language and create your language.
Click Sync to make sure all the phrases available for translation are loaded.
Click each row under the Source text column and then enter your translation to the textarea field at the bottom.
Click the Save button above once you have finished your translations.
Language file location
On the language selection page, click Move under your language and make sure to select System or Custom for Choose a new location for these translations, so that your changes will not be lost when the plugin is updated.
![]()
Updating from v1.x to v2.0
With the release of version 2.0, all additional plugins (Frontend, Payments, Reviews, etc.) have been integrated into the core plugin. Consequently, separate language files are no longer used.
Please consolidate ALL your existing custom translation files into a single directories-pro language file (e.g., directories-pro-ja_JP.po) by following the steps below:
Step 1: Load your EXISTING CUSTOM translations (Source) into memory
Open Poedit. Go to Poedit -> Settings (on Mac) or File -> Preferences (on Windows).
Click the Translation Memory tab.
Click Learn from files... (or Add files...).
Navigate to your custom languages folder (e.g., wp-content/languages/plugins/) and select ALL your old custom translation files.
Include files from previous additional plugins: directories-payments-xx_XX.po, directories-reviews-xx_XX.po, etc.
Include files from the old version of Directories Pro: directories-pro-xx_XX.po (your old custom version).
Poedit will now scan and store all the translations from these files into its database.
Step 2: Prepare the NEW translation file (Target)
Navigate to the new plugin folder (wp-content/plugins/directories-pro/languages/).
Scenario A: If an official file exists for your language (e.g., directories-pro-fr_FR.po):
- Open that file in Poedit.
Scenario B: If your language file does NOT exist:
Open the template file: directories-pro.pot.
Click Create New Translation.
Select your language.
In the top menu bar, click Translation.
Select Pre-translate (or Fill with Translation Memory).
Poedit will automatically fill in the translation fields using your custom data stored in Step 1.
Step 3: Save to the correct location
Go to File -> Save As...
Save the file to your safe custom language folder (e.g., wp-content/languages/plugins/directories-pro-xx_XX.po) to prevent it from being overwritten during future updates.
Upload the .po and .mo files to your server.