Installation
Follow the steps below to complete the installation of Directories Pro.
Check installation requirements
The following are required on your server (or your website) to install Directories Pro:
- PHP 7.4.0 or greater
- MySQL 5.7.8 (or MariaDB 10.3) or greater
- WordPress 6.5.0 or greater
Once you have confirmed that your server meets all of the above requirements, proceed to the next step to download and install Directories Pro.
Download package
Directories Pro can be downloaded from https://codecanyon.net/downloads/. Note that you will need to log in with a CodeCanyon (or Envato) account to access the download page. Once you are on the page, scroll down to where it says Directories Pro for WordPress, then click the green Download button on the right and select the All files and documentation option. Your browser should start downloading the file instantly.
Locate the downloaded file on your computer (the name of the file is codecanyon-xxxxxxxx-directories-pro-for-wordpress.zip), and double-click the file to unzip (extract) the package. You should then see a folder named DirectoriesPro-x.x.x (where x.x.x represents the version number) containing directories-pro-x.x.x.zip. This is the plugin file that you will install and activate on your site in the next step.
Install and activate the plugin
Now that you have the plugin file, follow the steps below to install and activate it on your site.
Log in to your website if you are not already logged in, and go to the WordPress administration dashboard.
Select Plugins -> Add New from the side menu.
Click the Upload Plugin button at the top of the page.
Click Browse... and locate the directories-pro-x.x.x.zip file on your computer.
Click the Install Now button.
Wait until the page refreshes, then click the Activate Plugin link.
If the installation is successful, you will be redirected to the Plugins page and should see the Directories Pro plugin highlighted in blue, indicating that the plugin is installed and currently active.
Register your license key (purchase code)
To protect valid purchasers of the plugin, some parts of Directories Pro are deactivated or inaccessible until your site is validated with a license key. If you do not currently have your license key, make sure to download it from https://codecanyon.net/downloads/. If you cannot find your purchase code, please refer to: https://help.market.envato.com/hc/en-us/articles/202822600-Where-Is-My-Purchase-Code-
Once you have your license key, follow the steps below to validate your site.
Log in to your website if you are not already logged in, and go to the WordPress administration dashboard.
Click Directories in the admin sidebar.
Click the Settings tab, then the System sub-tab.
Copy and paste your purchase code into the text input field under the License Keys section.

Click Save Changes at the bottom of the popup window.
Configure map libraries
If you plan to use any map features, you will also need to configure the map libraries used by Directories Pro.
Log in to your website if you are not already logged in, and go to the WordPress administration dashboard.
Click Directories in the admin sidebar.
Click the Settings tab and then the Map sub-tab.
Scroll down to the Map API Settings section and configure the following:
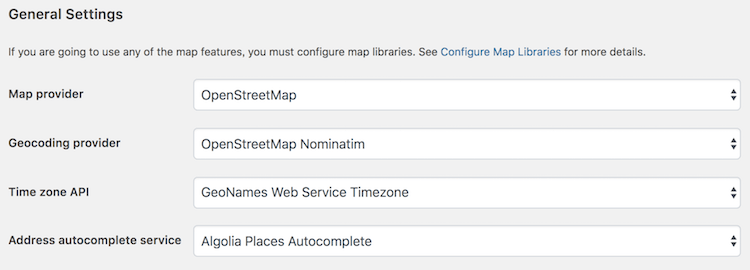
Map provider - Select the provider of map tiles used to render maps. This is required to display or locate listings on a map, and to use any additional features of the API (Geocoding, Time Zone, Autocomplete, etc.).
Google Maps - Free for mobile, partially free for web. Requires a Google Maps API Browser Key.
OpenStreetMap - Free.
Geocoding API - Select a geocoding service provider to enable geocoding and reverse geocoding of addresses. Geocoding lets users search your directory by arbitrary location address. Reverse geocoding is used to find the address of a location when the map in the add listing form is clicked, and then auto-fill the address form field.
Google Maps Geocoding - Partially free. Requires Google Maps API Browser and Server Keys; very reliable.
OpenStreetMap Nominatim - Free, not very reliable.
Mapbox Geocoding - Free up to 50,000 requests per month, then $0.50 per 1,000 requests. Requires a Mapbox access token.
Time zone API - Select a time zone API used to fetch the time zone ID of a location, which is used to determine whether the business listing is currently open at its location. If none is selected, the time zone configured in WordPress settings will be used.
Google Maps Time Zone - Partially free. Requires Google Maps API Browser and Server Keys.
Time API Time Zone API - Free. See https://timeapi.io/ for details.
GeoNames Web Service Timezone- Free. Requires a GeoNames username and their free web services enabled from their user account page (https://www.geonames.org/manageaccount).
Places API - Select an API used to fetch place details from a map web service. See https://codecanyon.net/item/directories-pro-for-wordpress/21800540/faqs/47261.
- Google Maps Place Details - Partially free. Requires a Google Maps API Server Key.
Address autocomplete service - Adds an autocomplete (or auto-suggest) feature to the location search field of the directory search form and Location type fields (full address field only).
Google Maps Place Autocomplete - Partially free. Requires a Google Maps API Browser Key.
Algolia Places Autocomplete- Free up to 100,000 requests per month, then $0.40 per 1,000 requests. Requires an Algolia application ID and API key.
Obtaining a Google Maps API key
Note: You can skip this section if you have not enabled any of the Google Maps API services.
Create an API project
Make sure that you already have a valid Google account, then go to Google API Console. If you are not logged into Google, you will be prompted to log in first.
On the Dashboard page of Google API Console, create a new project or select an existing project.
Click +ENABLE APIS AND SERVICES and enable the following APIs found under the Maps category:
Maps JavaScript API - Required if Map provider is Google Maps.
Geocoding API - Required if Geocoding API is Google Maps Geocoding.
Time Zone API - Required if Time zone API is Google Maps Time Zone.
Places API (New) - Required if Places API is Google Maps Place Details or Address autocomplete service is Google Maps Places Autocomplete.
Maps Static API - Required if you wish to show a static map image of a location without requiring JavaScript or any dynamic page loading.
Generate a Browser Key
A Browser Key is required to use the Maps JavaScript API, Time Zone API, or Places API (Google Maps Places Autocomplete) with Directories Pro.
Follow the steps below to create a Browser Key for Google Maps API:
On the Credentials page, click the Create credentials dropdown button and click API key.
On the API key created pop-up, click RESTRICT KEY.
Under Key restrictions -> Application restrictions, select HTTP referrers (web sites) and enter the URL of your site. For example, if the URL of your site is https://www.example.com/, enter *.example.com/*. If your site's URL does not include a subdomain (for example, https://example.com/), enter example.com/*.
Scroll down and click Save.
Generate a Server Key
A Server Key is required to use Geocoding API, Time Zone API, or Places API (Google Maps Place Details) with Directories Pro.
Follow the steps below to create a Server Key for Google Maps API:
On the Credentials page, click the Create credentials dropdown button and click API key.
On the API key created pop-up, click RESTRICT KEY.
Under Key restrictions -> Application restrictions, select IP addresses and enter the IP address of your server.
Scroll down and click Save.
Enable billing
As of July 16, 2018, Google requires billing to be enabled for each API project in order to use Google Maps APIs. To enable billing, click the following link to Google Cloud Platform and follow the instructions displayed: https://console.cloud.google.com/projectselector/billing/enable