Exporting and Importing Content
Exporting Content to CSV
The CSV export feature lets you export any content of your directory to a CSV file in just a few number of clicks.
Follow the steps below to export your directory content to a CSV file:
Login to your website if not yet logged in and go to the WordPress administration dashboard.
Select All Listings (or Categories, Tags, Locations, Claims, Reviews depending on the type of content to export) under your directory menu in the admin sidebar.
Click the Export button at the top of the page.
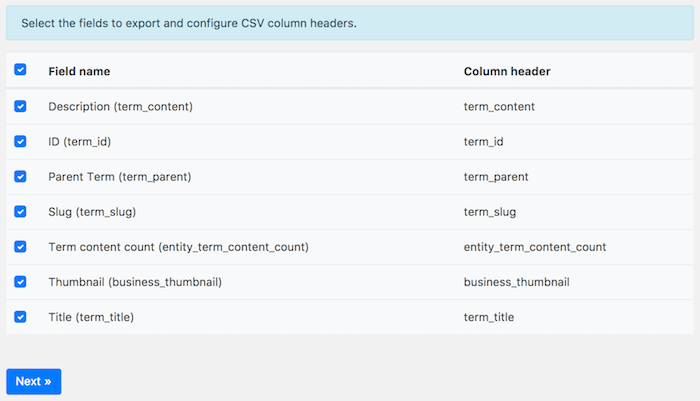
Select the fields to export by checking the checkboxes and then press Next.
Depending on the fields selected, additional options that need to be configured before exporting to a CSV file are displayed. For example, you can choose whether or not to export image files to a zip file if you have selected an Image type field to export in the previous step.
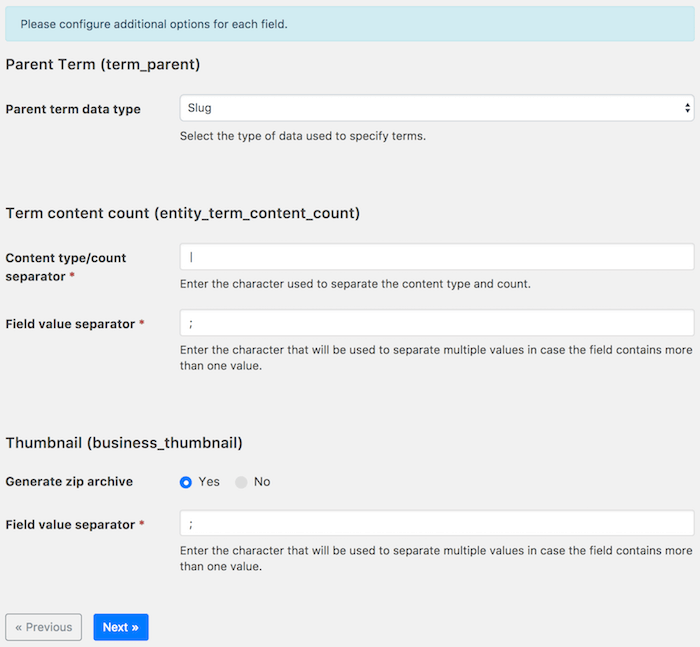
If you are unsure about these options, it is usually safe to leave them as-is.
Click the Next button to proceed to the final step:
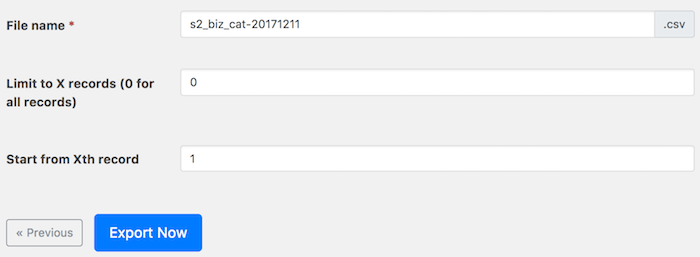
File name - Enter the name of the CSV file to export. The file will be created under wp-content/uploads/drts/System/tmp if export is successful.
Limit to X items (0 for all items) - Enter the number of content items to export.
Start from Xth item - Specify from which content item to start exporting. For example, enter 10 to skip the first 9 records and start exporting from the 10th records in the database.
Number of items to process per request - The export process is triggered through AJAX requests. Set the number of content items that are exported in each request. If you are unsure, leave it as-is.
When you are ready, click Export Now.
You will see a real-time progress of what is exported and, if any, failed.

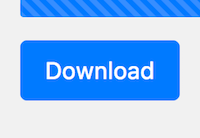
When the export process is complete, a blue Download button will show up under the progress bar which you can click to download the exported file.
If for some reason the download button does not appear or work, you can also find the exported file under wp-content/uploads/drts/System/tmp if the export was successful.
Importing Content from CSV
Importing content to Directories Pro involves creating a CSV file and loading the file data into your directory using the built-in CSV importer.
Creating a CSV file
There is no fixed format for your CSV file, since the columns in your CSV file can be mapped with content fields during the import process. The only thing that is required with your CSV file is that the first row must contain labels for each column in the subsequent rows.
Note: If you need a sample CSV file, the easiest way to obtain one is to create one or more posts or taxonomy terms and then exporting them to a CSV file. See Exporting Content to CSV for details on exporting CSV files.
Here are some tips specific to the type of content to import:
Category / Location
Associating parent terms
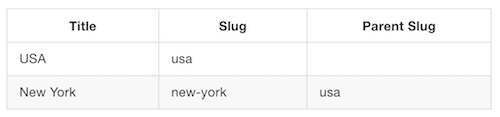
Create a column that holds either the ID or the slug of the parent term to be associated with. If the parent term is not an existing term (does not exist in the database), make also sure to create a column that holds either the ID or the slug of each term so that values in that column can be used to reference parent terms.
Listing
Associating taxonomy terms
Create a column that holds either the ID or the slug of the the taxonomy term to be associated with if the term is an existing term. If the term is not an existing term (does not exist in the database), instead create a column that holds the display title of the term, then the importer will create a new taxonomy term in the database with the value of that column as the term title and associate it with the listing.
Importing location data
Create a column that holds the full address of each listing and map that column to the Full Address component of the Location (location_address) field. This will let the importer geocode the address (can be disabled) by querying the geocoding provider and retrieve detailed geographic information of the location such as latitude and longitude coordinates. Make sure that you have selected a geocoding provider and have configured its API settings under Directories -> Settings -> Map -> General Settings in order to use this feature.
If your CSV file does not have a column that can be mapped to Full Address during import, you can also later run the Load geolocation data tool from Directories -> System -> Tools after you have imported listings. However this does require each listing to have other location field values already imported such as values for street address, city, and province fields which the tool will use to query the geocoding provider for geolocation data (lat/lng coordinates and timezone).
Claim
Associating claimed listings
Create a column that holds either the ID or the slug of the listing claimed. The listing must already exist in the database.
Importing your CSV file
Follow the steps below to import your CSV file:
Login to your website if not yet logged in and go to the WordPress administration dashboard.
Select All Listings (or Categories, Tags, Locations, Claims, Reviews depending on the type of content to export) under your directory menu in the admin sidebar.
Click the Import button at the top of the page.
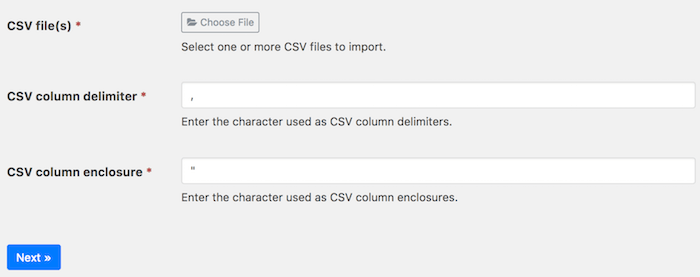
CSV File - Click Choose File and locate your CSV file.
You can also upload your CSV file to wp-content/uploads/drts/CSV using FTP then you should be able to select your CSV instead of uploading from this page.
Note: Depending on your server, the import process may fail or stop before importing all items if you have a very large CSV file. In that case, split the CSV file into multiple files and then upload them. Make sure that all the files have the same header columns in the first row. The importer will then process those files one by one.
CSV column delimiter - Enter the character used as CSV column delimiters in your CSV file. The default value is a single comma.
CSV column enclosure - Enter the character used as CSV column enclosures in your CSV file. The default value is a double quote.
Click the Next button to go to the next step:
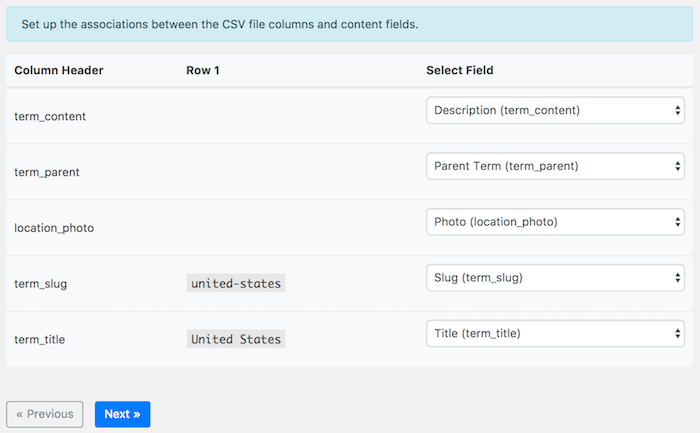
In this step, you will map the columns in your CSV file with fields that are defined for the content type to import. For each column header in your CSV file on the left, select a matching field on the right to be associated with.
After associating CSV columns with content type fields, click the Next button to proceed on to the next step:
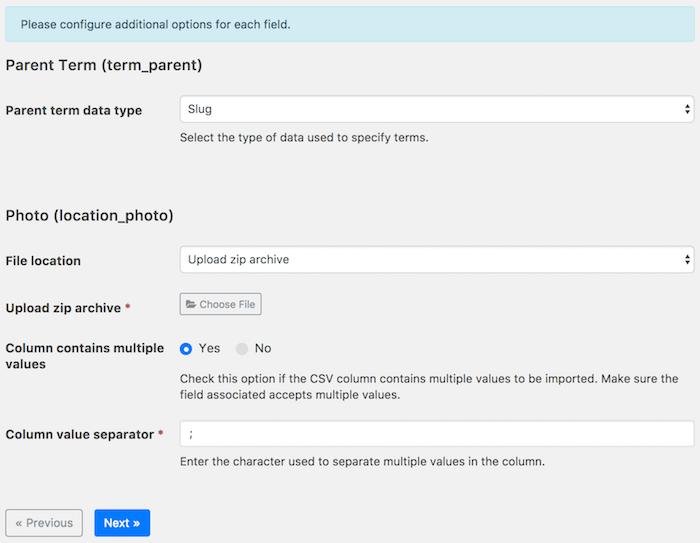
Some fields associated with the columns in your CSV file may have additional options that can be configured in this step. For example, if a field supports importing of multiple values, there will be an option for the field to specify the delimiter character used to separate values in the CSV column. Another example is an Image type field which lets you upload a zip file containing image files to be imported for the field.
If you are unsure about these options, it is usually safe to leave them as-is.
Click the Next button to proceed to the final step:
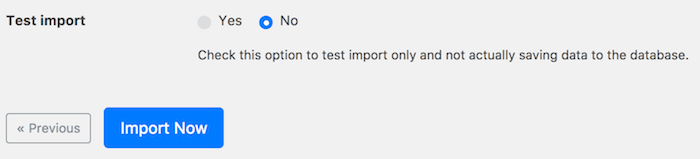
- Number of items to process per request - The import process is triggered through AJAX requests. Set the number of content items that are imported in each request. If you are unsure, leave it as-is.
When you are ready, click Import Now to import your CSV file.
You will see real-time progress of what is imported and, if any, failed.

Updating existing content
You can also update existing content through CSV import. Simply create a column in your CSV file that holds existing content item IDs and map that column with the ID field of the content type when importing.
Importing Listings with WP All Import
Directories Pro includes an add-on for the WP All Import plugin which lets you easily import listings from any CSV or XML file.
To import listings using WP All Import, make sure the WP All Import plugin is installed and activated and then follow the steps below :
Login to your website if not yet logged in and go to the WordPress administration dashboard.
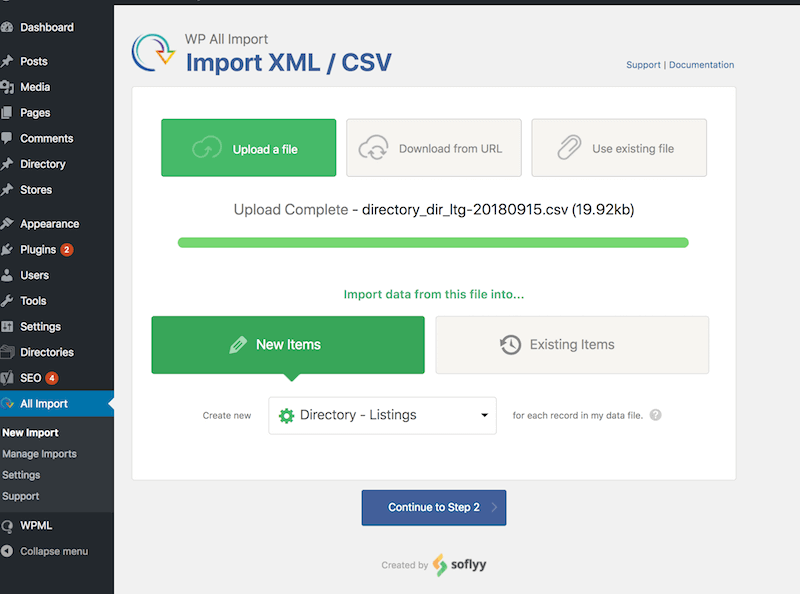
Select All Import -> New Import in the admin sidebar.
Upload a CSV/XML file or enter a URL to download the file, select your directory listings option from the dropdown and click Continue to Step2.
Configure filtering options if you need to and then click Continue to Step3.
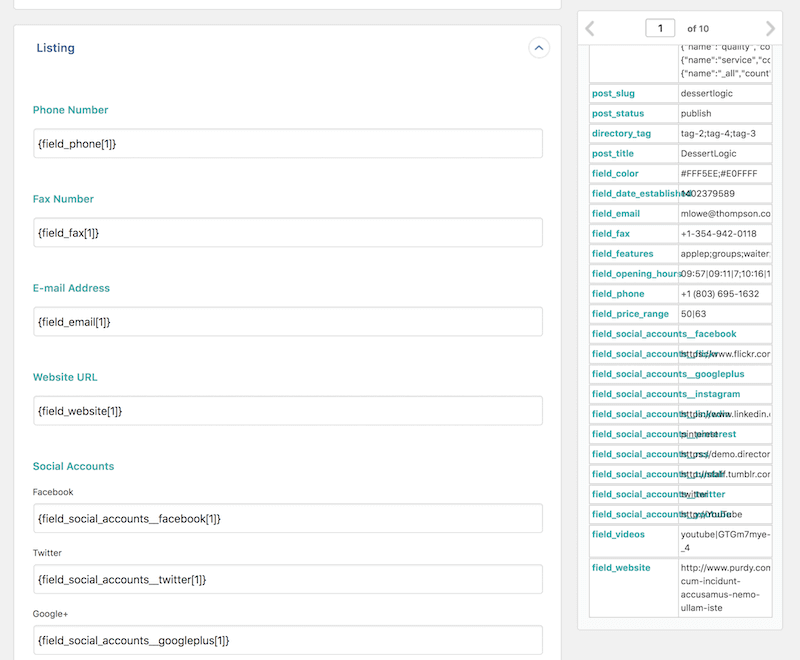
Drag and drop the fields from your CSV or XML file into the appropriate corresponding listing fields. After filling out the fields, click Continue to Step4.
For the Unique Identifier option, click the Auto-detect button if you are unsure.
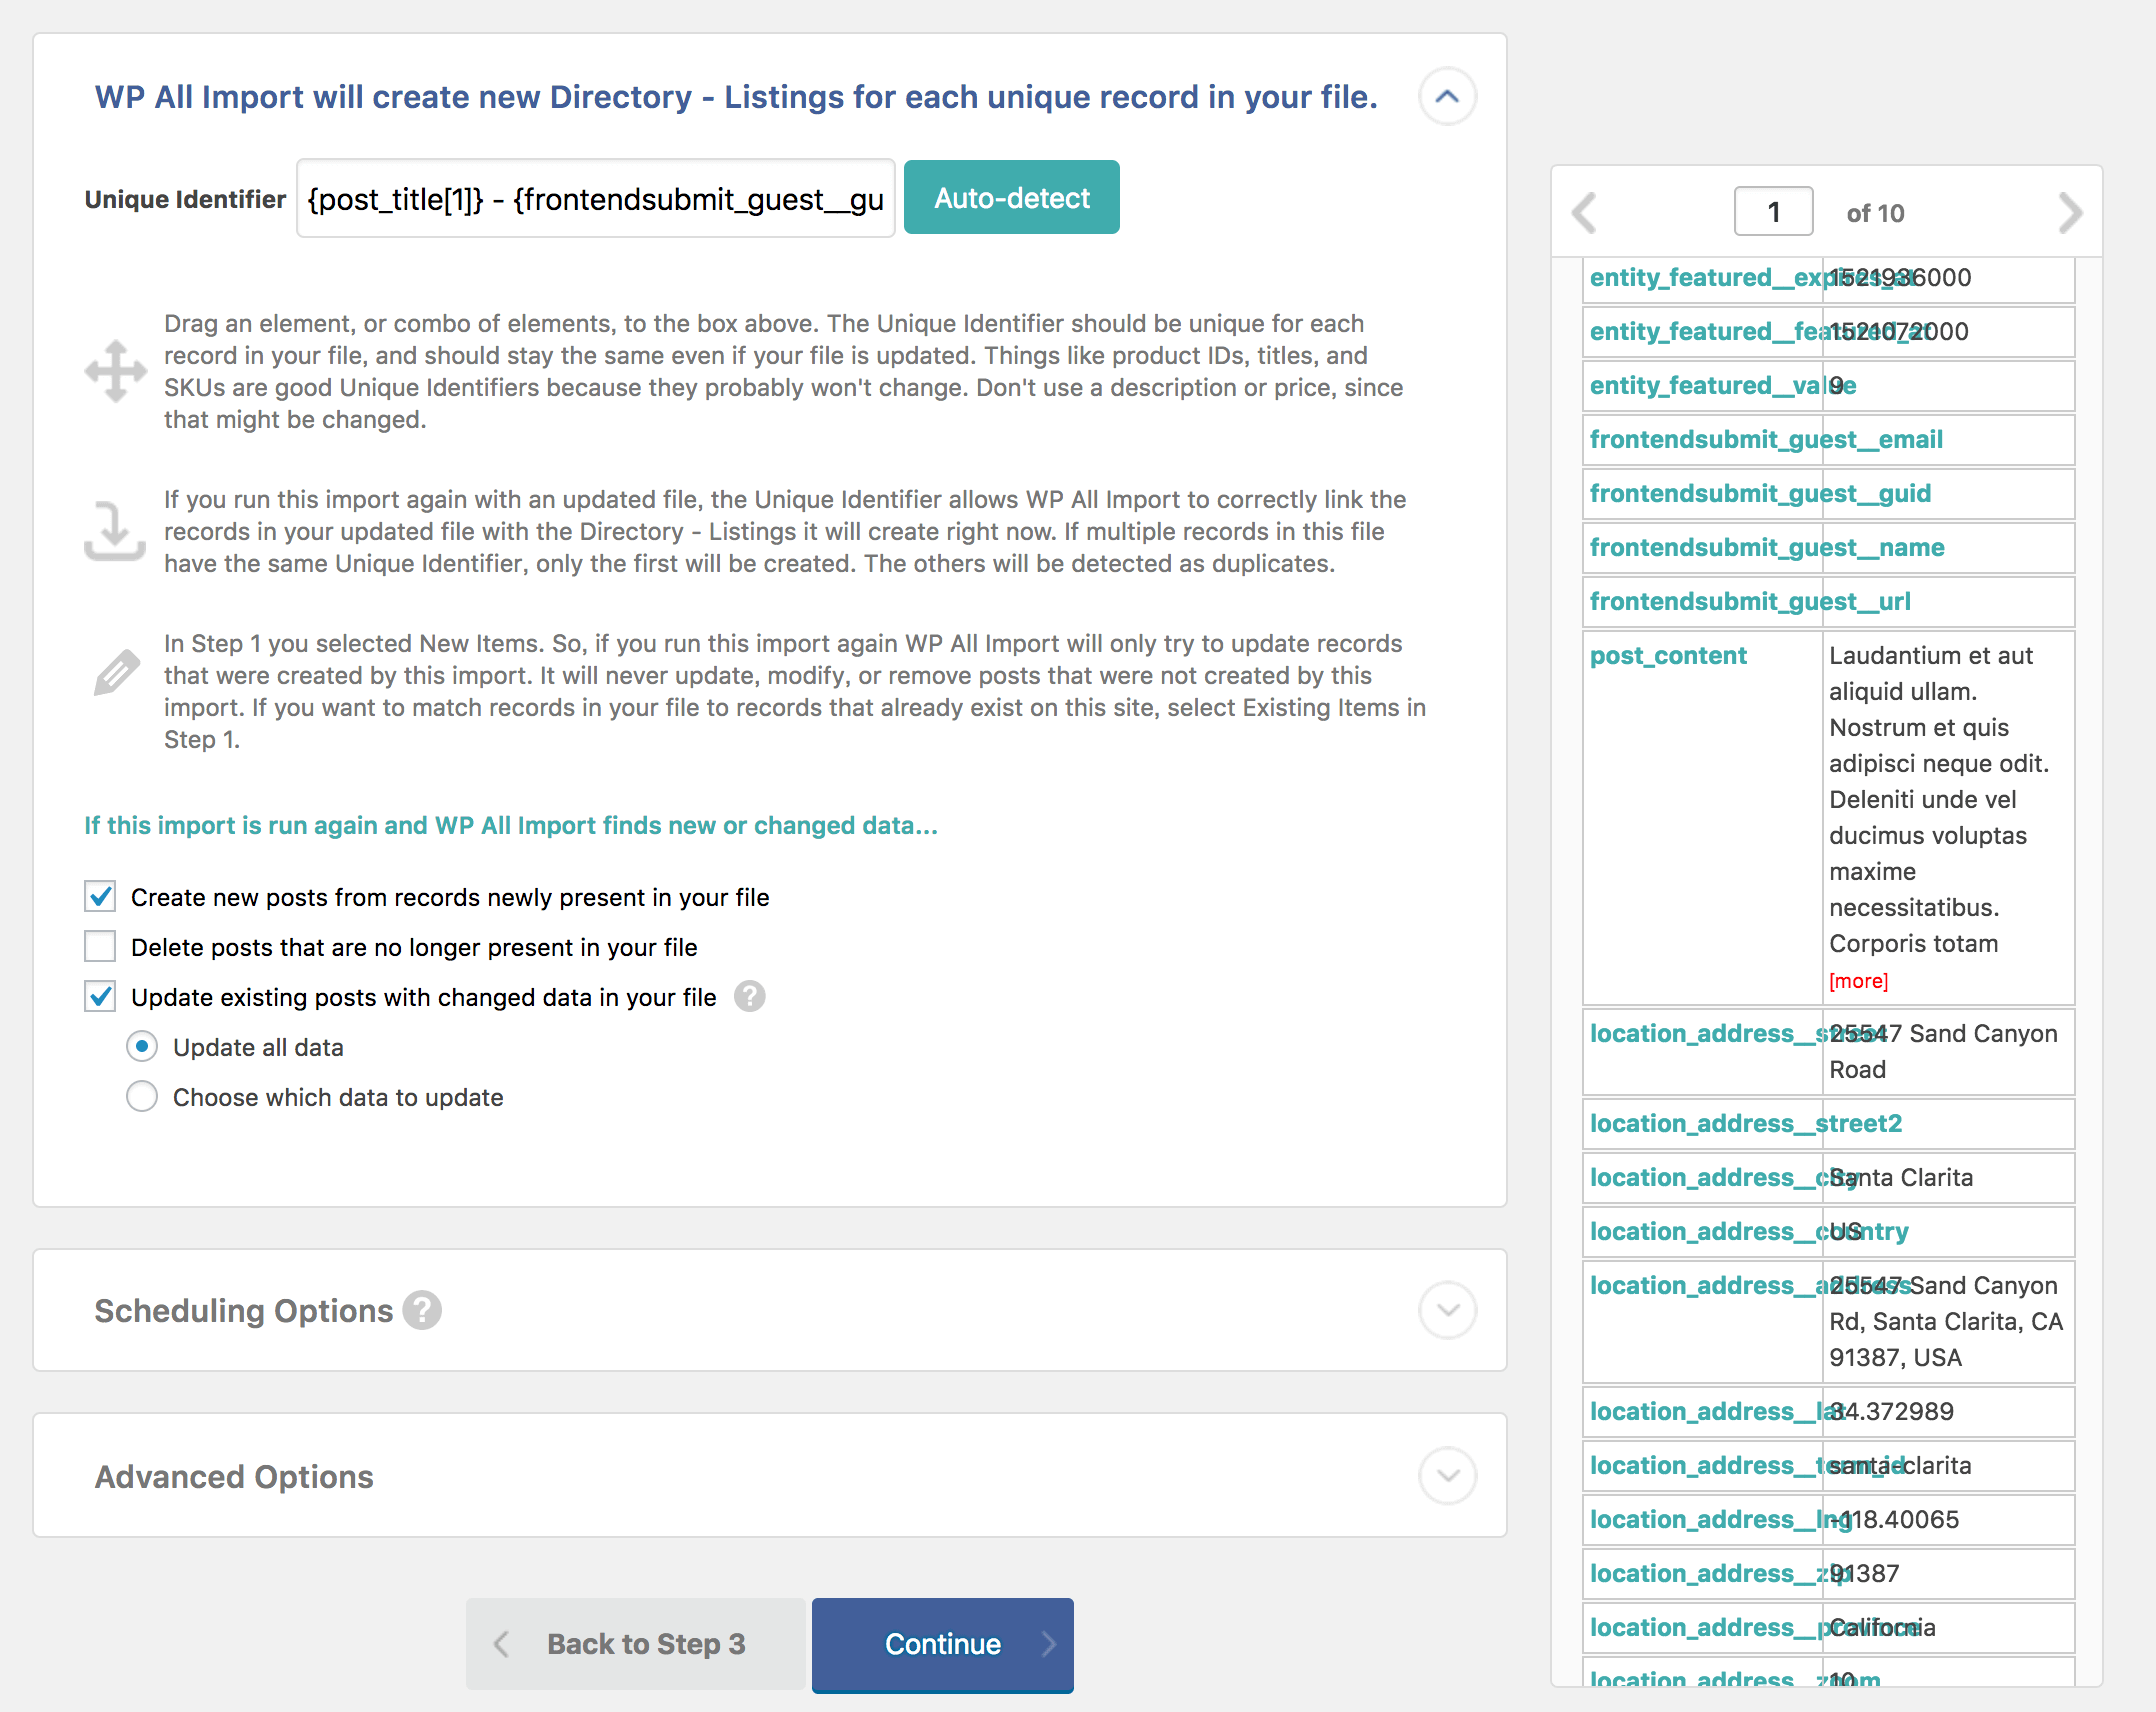
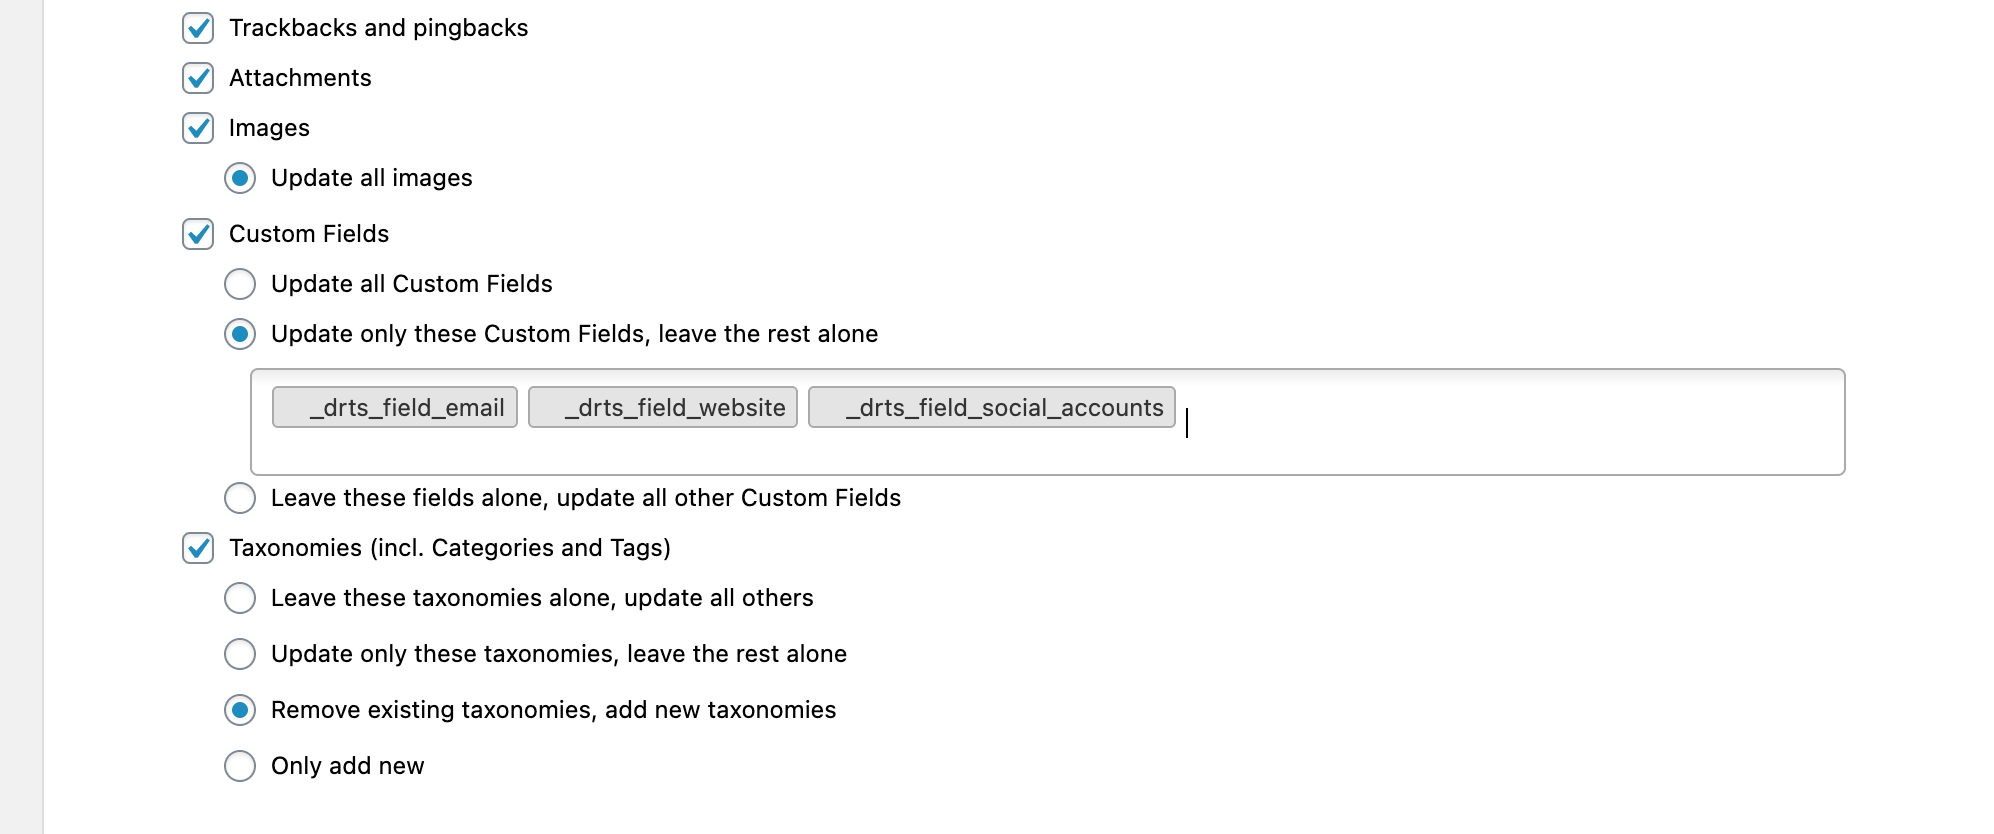
You can also specify which fields should or should not be updated with import when importing data for existing listings. Make sure to prefix field names with _drts_, so for example enter _drts_field_email for the field_email field.
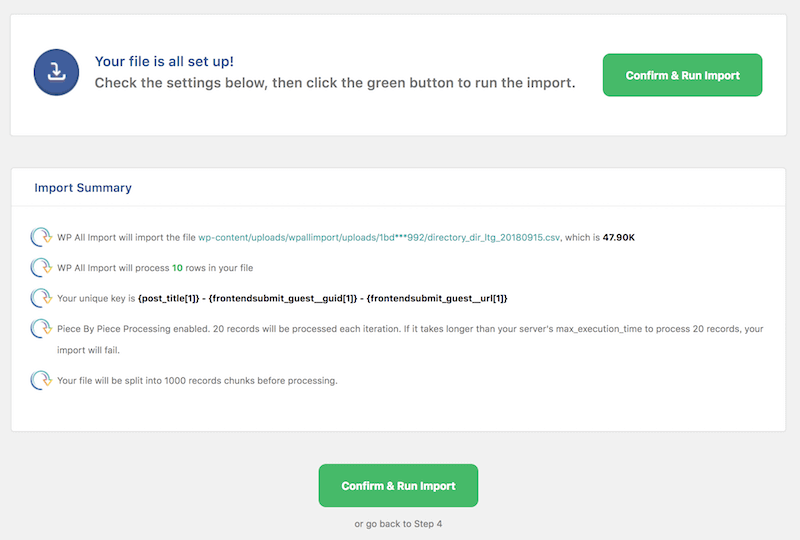
If you are happy with the import click the Confirm and Run Import button.